Picture this: you’ve made the decision to embrace sustainable energy and invest in a solar generator. Congratulations on taking this environmentally-conscious step! Now, it’s time to tackle the installation process. Don’t worry, this article has got you covered. In the next few paragraphs, we’ll discuss the step-by-step guide to installing a solar generator and explore the benefits it will bring to your daily life.
First, we’ll walk you through the preliminary steps and considerations before you even start the installation process. From assessing your energy needs to finding the ideal location for your solar generator, these crucial preparations will ensure a smooth and successful installation. Once you have the groundwork laid out, we will move on to the actual installation process, where we will provide clear instructions and expert advice on connecting the generator to your home’s electrical system. By the end of this article, you’ll be equipped with all the knowledge you need to confidently install a solar generator and embark on your renewable energy journey.
Get ready to embrace the power of the sun and revolutionize the way you power your home. Whether you’re an eco-warrior looking to reduce your carbon footprint or simply someone looking to save money on their energy bills, installing a solar generator is a wise and forward-thinking choice. So, let’s dive into the world of solar power and explore how you can harness the energy of the sun right at your doorstep. Installing a solar generator may seem like a daunting task, but with the right knowledge and preparation, it can be a smooth and rewarding process. This article will guide you through each step, offering helpful tips and advice along the way. So, let’s get started on choosing the right solar generator for your needs!
Choosing the Right Solar Generator
Before diving into the installation process, it’s essential to choose the right solar generator that meets your power needs. Consider the wattage requirements of the devices you plan to power with the generator. Make a list of all the appliances, electronics, and tools you want to run, and calculate the total wattage. This will help you determine the size and capacity of the solar generator you need.
Additionally, evaluate the type of solar generator that suits your needs. There are portable solar generators and fixed solar generators. Portable ones are great for camping or outdoor activities, while fixed ones are more suitable for home or business use. Assess your intended usage and mobility requirements to make an informed decision.
Assess the Portability Factor
If you’re considering a portable solar generator, it’s crucial to assess its portability factor. Look for generators that are lightweight, compact, and easy to carry. Some models come with wheels or handles for added convenience. Remember that you may need to transport the generator to various locations, so prioritize portability when making your selection.
Determine the Battery Capacity
The battery capacity of a solar generator determines how long it can power your devices. Consider your energy requirements and the duration you expect the generator to provide power. Look for generators with larger battery capacities if you anticipate longer periods without access to sunlight or if you plan to run high-power devices. Assessing the battery capacity will give you an idea of how reliable and efficient the solar generator will be for your needs.
Check the Charging Options
Solar generators can be charged through various methods. Some models come with built-in solar panels, while others require external panels to harness solar energy. Check the charging options available with the solar generator you’re considering. If it only relies on solar charging, ensure that it has a sufficient solar panel capacity to meet your power needs. Alternatively, if it can be charged using an AC outlet or a vehicle’s power socket, consider whether these options align with your usage requirements.
Now that you have selected your solar generator let us move on to the installation process!
Select an Ideal Location
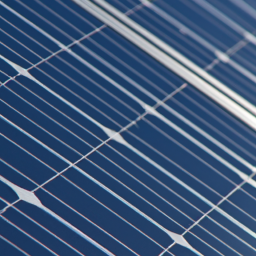
Choosing the right location for your solar generator is crucial for optimizing its performance. Look for an area that receives ample sunlight throughout the day. Ideally, the location should have minimal obstruction from trees, buildings, or other objects that can cast shadows on the solar panels. Consider the direction the solar panels will face – south-facing panels receive the most sunlight in the northern hemisphere.
Ensure Proper Sunlight Exposure
To maximize the solar generator’s efficiency, ensure that the chosen location receives optimal sunlight exposure. Pay attention to any factors that may obstruct sunlight, such as nearby buildings or foliage. Regularly monitor the location throughout the day to confirm that it remains unobstructed and receives direct sunlight for long durations.
Position the Solar Panel Correctly
Once you have determined the right location, it’s important to position the solar panel correctly. Tilt the panel at an angle that corresponds to the latitude of your location. This angle helps maximize solar energy absorption. Additionally, ensure that the solar panel faces true south in the northern hemisphere to receive the maximum amount of sunlight.
Consider Shelter from Weather Elements
While sunlight exposure is crucial, it is also important to consider the potential impact of weather elements on your solar generator. Choose a location that offers some protection from rain, snow, or extreme heat. This can help extend the lifespan of your solar generator and prevent any damage caused by severe weather conditions.
With the location and positioning sorted, it’s time to prepare for the installation process.
Gather the Required Tools
Before beginning the installation, gather all the necessary tools for the job. Some common tools you may need include wrenches, screwdrivers, wire cutters, and a drill. Having the right tools on hand will make the installation process smoother and more efficient.
Refer to the Manufacturer’s Instructions
It’s essential to refer to the manufacturer’s instructions specific to your solar generator. These instructions will provide step-by-step guidelines on how to install and set up the generator correctly. Follow the instructions carefully to ensure a safe and efficient installation.
Check Local Permits and Regulations
Before installing a solar generator, it is important to check if any permits or regulations are required in your area. Certain localities may have specific requirements or restrictions regarding solar panel installations. Be sure to obtain any necessary permits and adhere to all regulations to avoid any legal issues down the line.
Ensure Safety Measures
When handling any electrical installation, safety should be your utmost priority. Make sure you are familiar with electrical safety guidelines and procedures. Ensure that you wear appropriate protective gear like safety gloves and goggles. Take necessary precautions to prevent accidental electrocution or any other mishaps during the installation process.
Perform a Site Survey
Before proceeding with the installation, perform a site survey to assess the surroundings and any potential hazards. Identify any obstacles or potential risks that may affect the installation process or the performance of the solar generator. This survey will help you plan the installation effectively and avoid any unwanted surprises during the process.
Now that you have gathered the necessary tools, are aware of the instructions, permits, and safety precautions, let’s move on to installing the solar panels.
Mounting the Solar Panels
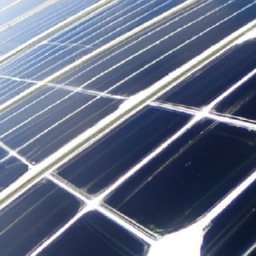
Mounting the solar panels is a crucial step in the installation process. Follow the manufacturer’s instructions to ensure proper attachment to a secure structure, such as the roof or a mounting frame. Be mindful of the direction and tilt angle discussed earlier to optimize solar energy absorption.
Connect Multiple Panels in Series or Parallel
If you have multiple solar panels, you will need to connect them properly to ensure efficient energy production. The panels can be connected in either series or parallel configurations. Series connections increase the overall voltage, while parallel connections increase the overall current. Choose the configuration that is suitable for your solar generator and follow the manufacturer’s guidelines to connect the panels correctly.
Wiring Solar Panels to the Charge Controller
The charge controller is a vital component that regulates the flow of electricity from the solar panels to the battery. Follow the manufacturer’s instructions to connect the solar panels to the charge controller properly. Use high-quality wiring and connectors for a reliable and secure connection.
Grounding the Solar Panels
Grounding the solar panels is an important safety measure. It helps protect against electrical shock and reduces the risk of damage caused by lightning strikes. Follow the manufacturer’s instructions to properly ground the solar panels. Consult with an electrician if you are unsure about the best grounding practices for your specific installation.
Securing and Protecting the Panels
Once you have installed the solar panels, ensure that they are securely fastened to prevent any movement or damage. Use appropriate mounting brackets or clamps to secure the panels in place. Additionally, consider using protective measures like bird deterrents or anti-theft devices to safeguard your investment.
The next step in the installation process is connecting the charge controller to the solar panels.
Locate an Accessible Position
The charge controller should be installed in a location that is easily accessible for monitoring and maintenance. Choose a spot near the solar panels that allows for convenient access to the controller’s display and controls. Ensure that the location is well-ventilated to prevent overheating.
Connect Solar Panels to the Charge Controller
Follow the manufacturer’s instructions to connect the solar panels to the charge controller. Typically, this involves connecting the positive and negative leads from the solar panels to the appropriate terminals on the charge controller. Use the correct wire gauge and connectors to ensure a secure connection.
Connect the Battery to the Charge Controller
Now, it’s time to connect the battery to the charge controller. Again, follow the manufacturer’s instructions to ensure proper connection. Typically, this involves connecting the positive and negative terminals of the battery to the corresponding terminals on the charge controller. Double-check the connections to ensure they are secure and properly aligned.
Attach Load Wires to the Charge Controller
Load wires connect the charge controller to the devices you want to power with the solar generator. Follow the manufacturer’s instructions to attach the load wires to the appropriate terminals on the charge controller. Ensure that the load wires are of sufficient size to handle the energy demands of your devices.
Double-Check Connections
Before proceeding further, double-check all the connections between the solar panels, charge controller, and battery. Ensure that all wire connections are secure, tight, and properly aligned. Proper connections are crucial for the safe and efficient operation of your solar generator.
Now that the charge controller is connected, it’s time to move on to the inverter installation.
Choose the Correct Inverter Size
Selecting the right inverter size is crucial to meet your power needs. Consider the wattage requirements of the devices you plan to connect to the inverter. Choose an inverter that has a sufficient capacity to handle the maximum wattage of your devices. It is better to go slightly higher in terms of capacity to accommodate any future additions or upgrades.
Position the Inverter Close to the Battery
The inverter should be installed close to the battery to minimize the distance travelled by the DC power from the battery. This reduces power loss and ensures efficient energy conversion. Choose a location that provides easy access for maintenance and monitoring.
Connect Battery Wires to the Inverter
Follow the manufacturer’s instructions to connect the battery wires to the inverter. Ensure that the positive and negative terminals of the battery align with the corresponding terminals on the inverter. Securely fasten the connections to prevent any loosening or accidental disconnection.
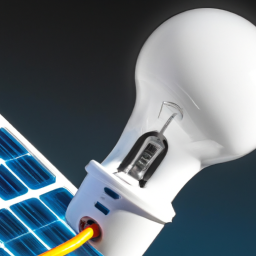
Connect AC Loads to the Inverter
Connect the AC loads, such as appliances or electronics, to the inverter. Follow the manufacturer’s instructions to make the appropriate connections. Ensure that the loads are within the maximum power capacity of the inverter. If the inverter has multiple outlets, distribute the loads evenly across them for efficient power distribution.
Test and Verify Inverter Connections
After making all the connections, it is essential to thoroughly test and verify them. Check each connection point to ensure that it is secure and properly aligned. Test the inverter by turning on a device connected to it and confirming that it receives power. Monitor the inverter closely for any signs of abnormal operation or malfunctions.
Once the inverter installation is complete, it’s time to connect the battery to the system.
Select the Right Type and Capacity
Choosing the right battery is crucial for the performance and longevity of your solar generator. Consider factors such as battery type (lead-acid or lithium-ion) and capacity (measured in Amp-hours). Assess your power requirements and select a battery that can provide sufficient power for your needs.
Place the Battery in a Safe Location
It is important to place the battery in a safe and well-ventilated location. Protect it from extreme temperatures, direct sunlight, and any potential hazards. Refer to the manufacturer’s instructions for specific guidelines on battery placement.
Connect the Battery Cables
Follow the manufacturer’s instructions to connect the battery cables. Attach the positive and negative terminals of the battery to the corresponding terminals on the charge controller or inverter. Ensure that the connections are tight and secure to prevent any voltage drop or accidental disconnection.
Test the Battery Connections
Once the connections are made, test the battery connections by turning on a device and confirming that power is being supplied. Monitor the battery closely for any signs of abnormal behavior or malfunctions. Regularly check the battery performance to ensure optimal operation.
With all the components connected, it’s time to wire the entire solar system.
Use Proper Conductor and Sizing
When wiring the solar system, it’s important to use proper conductors and wire sizes. Consult the manufacturer’s specifications and guidelines to determine the appropriate wire gauge for each connection. Using the correct wire size minimizes energy losses and ensures efficient power transmission.
Follow the Wiring Diagram
Refer to the wiring diagram provided by the manufacturer to ensure the correct wiring sequence. Follow the diagram step-by-step, connecting the solar panels, charge controller, inverter, and battery in the designated order. Double-check each connection point to ensure accuracy.
Connect Solar Panels, Charge Controller, Inverter, and Battery
Following the wiring diagram, connect the solar panels to the charge controller, the charge controller to the inverter, and the inverter to the battery. Ensure that all connections are secure, properly aligned, and adhere to the manufacturer’s guidelines.
Use Conduit and Cable Protections
To protect the wires from potential damage and ensure a clean and organized installation, use appropriate conduits and cable protections. Securely fasten the conduits and protectors to walls, ceilings, or any available structure. This will help prevent any accidental damage or tripping hazards.
With the solar generator installation complete, it’s time to finalize the process.
Secure and Label All Connections
Secure all the connections using zip ties, clips, or other appropriate fasteners. This will help prevent any accidental disconnection or damage caused by vibrations or movements. Additionally, label each connection point for easy identification and troubleshooting in the future.
Conduct a System Check
Before relying on the solar generator, conduct a thorough system check. Ensure that all components are properly installed and securely connected. Verify that all connections, including the solar panels, charge controller, inverter, and battery, are functioning correctly.
Perform a Functional Test
To ensure the solar generator is operating efficiently, perform a functional test. Connect a device, such as a light or small appliance, to the system and confirm that it receives power. Monitor the system closely during the test to identify any potential issues or areas for improvement.
Educate Yourself About System Operation
Finally, take the time to educate yourself about the operation and maintenance of your solar generator. Familiarize yourself with the user manual, warranty information, and any troubleshooting guides provided by the manufacturer. This knowledge will enable you to make the most of your solar generator and address any issues that may arise in the future.
Maintenance and Upkeep
To ensure the longevity and optimal performance of your solar generator, regular maintenance and upkeep are essential. Here are some key tasks to include in your maintenance routine:
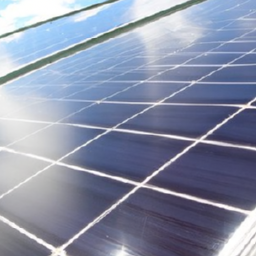
Regularly Clean Solar Panels
Dirt, dust, and debris can accumulate on the solar panels, reducing their efficiency. Regularly clean the panels using a soft brush or a specialized solar panel cleaning kit. Avoid using abrasive materials that may scratch the surface. Check for any signs of damage or wear during the cleaning process.
Inspect for Damage and Wear
Regularly inspect all components of the solar generator, including the solar panels, charge controller, inverter, battery, and wiring. Look for any signs of damage, wear, or corrosion. Address any issues promptly to prevent further damage or compromised performance.
Monitor Battery Performance
Keep an eye on the battery performance to ensure it is functioning optimally. Monitor the charge level, discharge rate, and any changes in performance. If you notice any significant changes or issues, consult the manufacturer’s guidelines or seek professional assistance.
Check Charge Controller and Inverter
Periodically check the charge controller and inverter for proper operation. Monitor the displays, indicators, and any error messages. Test the functionality by connecting devices and verifying the power supply. Address any issues immediately to maintain the efficiency and performance of your solar generator.
With these maintenance practices in place, your solar generator will continue to provide clean, renewable power for many years to come.
Installing a solar generator may seem like a complex task, but with the right knowledge and preparation, it can be an achievable DIY project. By considering your power needs, selecting the right solar generator, properly positioning the components, and ensuring a secure and efficient installation, you can harness the power of the sun and enjoy the benefits of clean, renewable energy. Remember to conduct regular maintenance and monitoring to maximize the performance and lifespan of your solar generator. So go ahead, take the leap, and embrace the power of solar energy!